


3. Capturing 360° images
1. Connect the camera to your mobile over Wi-Fi
1-①. Tap the serial number of the camera you want to connect or register a new camera if not previously registered.

1-②. Turn on the camera's power and Wi-Fi, and tap Connect on the app and select Join if requested.

2. Tap Start on the Auto Tour screen
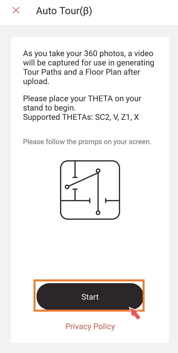
*Click the 'X' or Cancel in the upper left corner to exit Auto Tour.
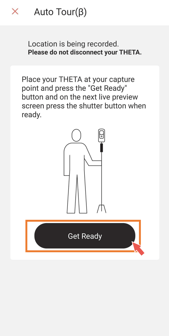
3. Place the THETA at the location to be photographed and tap Get Ready button
☆Tips to increase the success rate of Auto Tour
-
-
-
-
Do not move the THETA after it is placed at the shooting point
-
-
-
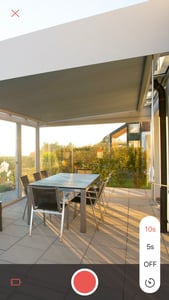
4. Tap the shutter button on your phone screen
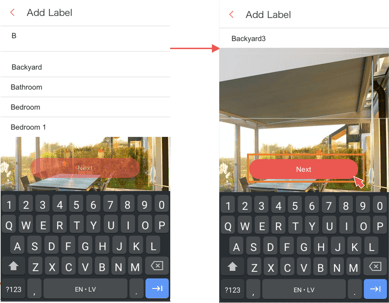
5. After the 360° image is captured and saved, select or enter a room name,
and tap the Next button on the label entry screen.
Do not move to your next location until the THETA video has started (beep).
6. Please move the camera after confirming the sound of the THETA indicating that recording has started.
7. After pressing the Next button, the next screen will be different.

You have the choice to continue on the floor you are on, or switch to another floor on the property.
・To take a photo on the current floor, tap Get Ready after moving the camera to your next location.
・To take a photo on a different floor, tap Next Floor before movingto the next location.
*Take 360° images in two or more locations, then tap Capture Complete.
(To continue photographing) Move to the next room or floor, and repeat steps 4~7.
☆Tips to increase the success rate of Auto Tour
-
-
-
-
-
When moving from one room/floor to another
-
-
Walk slowly
-
Open doors slowly as we are recording your path
- Do not walk back and forth along the same path
- Do not change the recording side of the camera.
Be sure the side with ‘THETA’ is always facing the main part of the room.
-
-
-
Do not turn on/off the lights on each floor until you have finished shooting
-
-
-
-
7. If you are moving to another floor, be sure to tap Next Floor,
then move to the next floor and tap Get Ready
8. When you are done with your tour, tap Capture Complete
* Do not disconnect the Wi-Fi connection between the THETA
and the mobile device in order to transfer video (location data) from the THETA to the mobile device.

4. Upload the captured images
1. Read the instructions and tap Upload or Upload Later

*Do not delete this tour or move it to another team until the upload is complete.
If you are not in a place with good Wi-Fi, choose Upload Later
Temporarily save the captured image to the device. Tap OK if all is well.
Please refer to step “6. Upload Later” below.
2. Tap OK when a dialog box appears informing you that the upload is complete
6. Upload Later
Please see this section for instructions on uploading captured data if you selected Upload Later in step 4-1
or if you selected Upload Later after an unsuccessful upload.
-
-
-
Open the list of tours and tap Upload shown on the thumbnail waiting to be uploaded.
Tap OK to begin the upload.
-
Wait for the upload to complete.
To cancel the upload in progress, tap Cancel Upload.
When the upload is complete, tap OK.
-
-